Mopping is one of the most common ways to clean floors, and when it comes to keeping highly trafficked areas like the kitchen and bathroom clean and germ-free, it’s an essential skill to learn. But mopping is not a one-size-fits-all cleaning solution, and knowing the right way to mop different types of floors will save you a lot of frustration, as well as prevent costly damage.
Ahead, you’ll find guidance on how to select the right mopping solution for your flooring type, the steps to follow to get a shiny clean floor, and how to select the right mop for the job. Additionally, we’ve broken down some dos and don’ts when it comes to mopping different flooring types, from hardwood and laminate to tile and linoleum.
Before Getting Started
Flooring materials, and their care, can be quite varied, so before you begin mopping, it’s essential that you know what type of flooring you have. The type of flooring will inform the choice of mopping solution and, in some cases, the type of mop itself.
- Tile floors should be wet-mopped with a chamois-style mop, using a mild detergent solution. If the tile is made of a natural stone like marble, granite, or slate, avoid cleaning agents with acids such as vinegar or lemon, which can cause pitting.
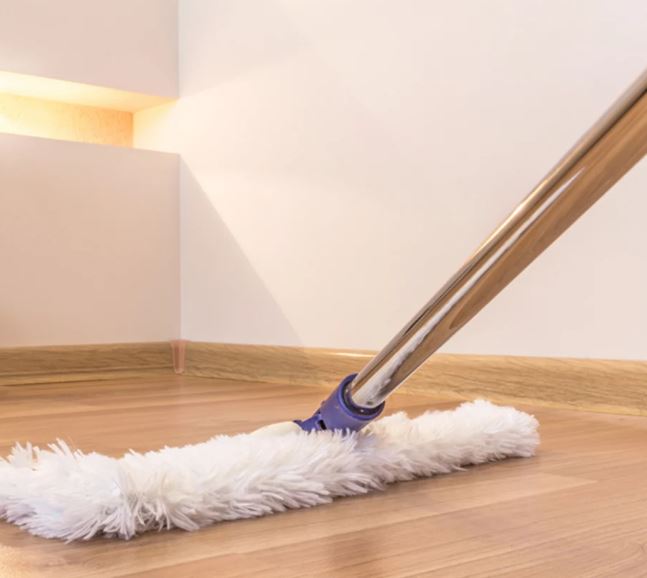
- Hardwood floors should be dry- or damp-mopped with a wood floor mop and wood floor cleaning product, diluted according to the manufacturer’s instructions.
- Laminate floors should be dry- or damp-mopped only; do not wet-mop laminate flooring, as exposure to excess water can cause swelling, bubbling, and warping, and avoid abrasive cleaners, which can cause scratching.
- Vinyl and linoleum floors should be wiped with a damp mop weekly; when deeper cleaning is needed, use a nonabrasive all-purpose cleaner to wet-mop vinyl or linoleum floors.
When it comes to floor cleaners, less is more: The overuse of cleaning products will leave a residue that lends a dingy, streaky, and dull appearance to floors; closely follow manufacturer instructions regarding dilution ratios. Additionally, the use of too much detergent can damage floors by leaving a film that requires several passes with clean water to remove, oversaturating floors and creating more work for you.
What You’ll Need
Equipment / Tools
- Vacuum
- Broom
- Mop
Materials
- 2 Bucket
- Mopping solution
- Microfiber cloth
Instructions
How to Mop Floors
Sweep or Vacuum Floors
Before introducing a wet mop to a dirty floor, sweep or vacuum the area to pick up as much dirt, dust, and other debris as possible. This will keep the floors from becoming a muddy mess when a liquid cleaning solution is introduced. Take note of any sticky spills or stuck-on messes that need to be spot-treated prior to all-over mopping, and handle those first.
Wet and Wring the Mop
Saturate the mop with mopping solution by dipping the mop in the bucket. Then, wring the mop out well, either using the built-in wringing mechanism or with your hands; the mop should not be dripping or sopping wet.
Mop in a Line or a Figure 8
Starting in the far corner of the room, begin mopping using a figure 8 motion for microfiber, string, and rag mops, or in a straight line if using a sponge mop. Work backwards, ensuring you’re standing on an unmopped section of the floor, to avoid tracking dirty footprints.
Spot-Treat Tricky Areas
If there are any sticky spots you missed in step 1, use the mop to spot-treat them by applying downward pressure while rubbing the mop quickly back and forth. If your mop cannot reach corners or joints, use a microfiber cloth dipped in the mopping solution to manually clean them.
Rinse Floors and Mop
Rinse the mop very well with clean water, and go over the floors to remove any residue from the mopping solution. If you are mopping a large area, you may choose to mop and rinse in sections, necessitating a two-bucket system for the mopping solution and clean water.
Clean the Mop Head
Clean the mop head itself, either by removing and laundering it or by washing it by hand in hot, soapy water and rinsing well.
Allow Floors and Mop to Dry
Allow the floor to dry completely before walking on it. After cleaning the mop head, rinse or wipe out the mop bucket; dry it completely before storing.
How Often to Mop Floors
How often to mop the floors varies based on a number of factors, including the size and composition of your household, how highly trafficked the floors are, and environmental factors. For example, the entryway floor in a household with children and pets in a dry, dusty climate will need to be mopped more often than in a guest bathroom in a one-person household.
Highly trafficked floors may be cleaned with a broom, dust mop, or vacuum every day or every other day; mop kitchen floors once every two weeks, and mop bathroom floors once a week. Less highly trafficked floors can be cleaned with a broom, dust mop, or vacuum once a week, and mopped once a month. Spot cleaning spills with a damp microfiber cloth, and an all-purpose cleaner if needed, can help to extend the time between mopping.
Best Products for Mopping
There are a lot of mopping solutions on the market, as well as recipes for DIY mopping solutions that you can make at home with common household items; some of them are quite good, some of them are quite bad, but most of them are just fine.
However, there is one product that is almost universally an excellent choice for all flooring types, that also has the benefit of being inexpensive, widely available, and almost certainly something you already have in the home: Dish soap. (Generally speaking, when a “mild detergent” is called for in cleaning instructions, it refers to dish soap.)